The first electronic microphone was invented and patented during the second half of the 19th century. There were a few different, not the most practical solutions invented, before the loose contact carbon microphone was built by Emelie Berliner and David Edward Hughes. My idea is to re-create a working microphone in a kit form, using the technology from Berliner and Hughes. The kit would be produced with education and experimenting in mind other than creating a practical device. It is for interested people, whom could create a working microphone using simple components, readily provided in a kit.
The version described below is the first prototype, and you can build it very easily. The kit under development will use a better configuration, which will be published later on. Eventually you will be able to order a full kit for constructing the microphone
The working principle of this mic goes like that: a DC current applied through a circuit which contains a “loose carbon contact”. With pressure applied (by the soundwaves) the current transmitted between the carbon contacts are changing and effectively creating an AC signal, which can be recorded or reconstructed back to sound with a speaker. It provides a limited frequency response, e.g., it is not suitable to pick up lower frequencies, but it works very well for voice recordings
Several design solutions were created, the simplest one is using solid carbon rods, while the most effective one is using crushed activated carbon. In fact, this technology was used in telephony till the late 1980s. In the 19th century people were experimenting with different carbon sources, like soot from oil lamps, etc. The most effective one was the activated carbon (same as you would buy nowadays as air/ water filters). Modern recreations are using pencil graphite inserts (otherwise known as pencil lead), pre-fabricated graphite rods or activated carbon.
Different simple designs can be found on the World Wide Web, to make a working device. The most popular one usually fashioned out of a matchbox tray and some pencil leads. To have it a bit more sophisticated, I have designed a 3d printable box, which will be published soon.
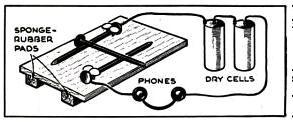
If you don’t have a 3d printer, the box can be made out of anything. Actually, you don’t even need the box if you can secure the graphite rods in any other way. If you don’t have a pencil, you can try to use nails instead, like in this drawing from 1945. However test them first if they are magnetic, and they should be made from steel with high carbon content. Unfortunately most nails nowadays are made from inferior steel.
Required components:
- Pencil lead (3 pieces)
- A few “crocodile clip” wire
- 9V battery (or any DC supply between 9-12V for safety)
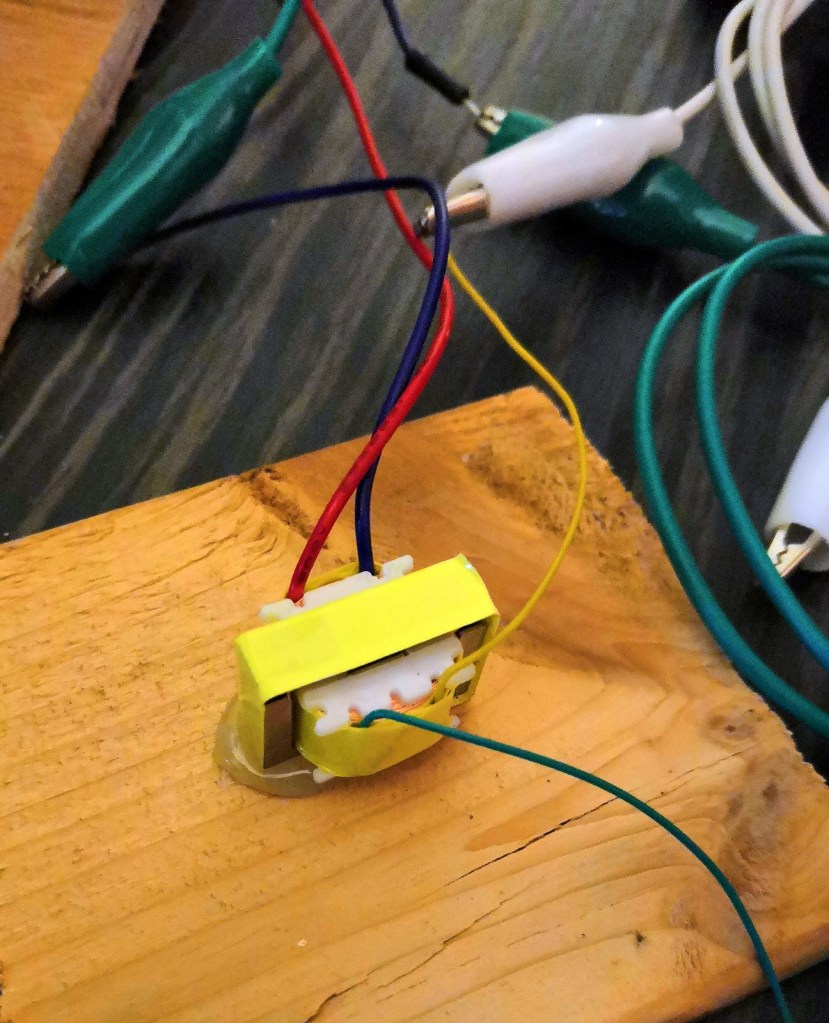
- Step up transformer – I am using a dedicated microphone transformer from a Shure SM87, but in theory any step up transformer is good. Alternatively you can connect a cheap headphone piece with a long wire and listen from e.g. another room, but you will not be able to record it
- A recording device. For convenience, I am using my laptop with an external audio interface. This can provide ample pre-gain amplification without using any other device. Alternatively if you can use a voice recorder with “line in” or even a tape recorder if you still have one.
Operation:
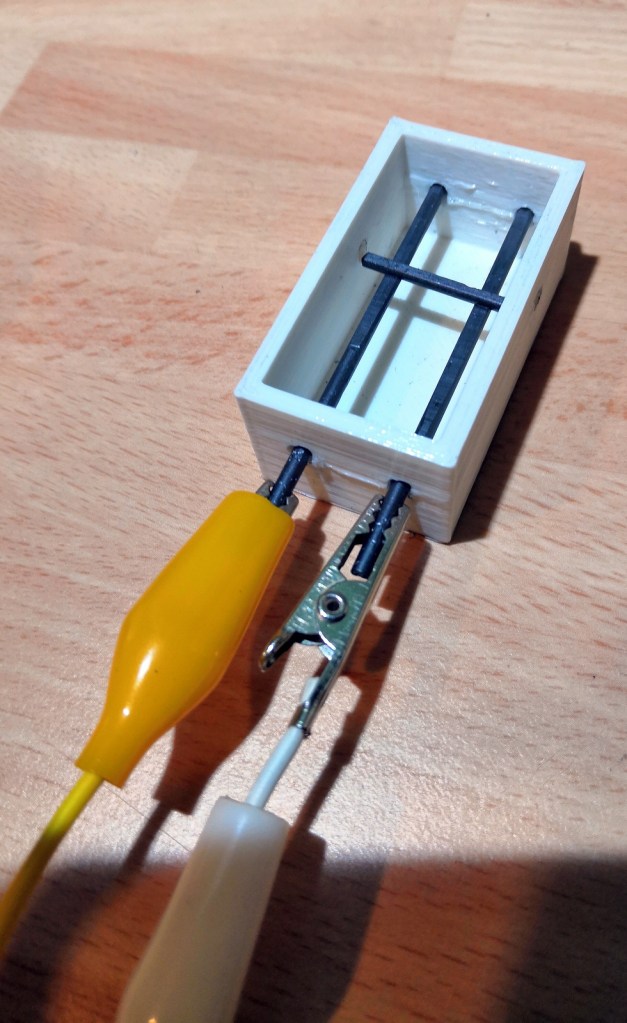
The three pencil leads will form the loose connection. Two of them attached to a wire via a crocodile clip and one is forming a bridge across the other two. Cylindrical leads can be sanded flat on one side, so they don’t roll away.
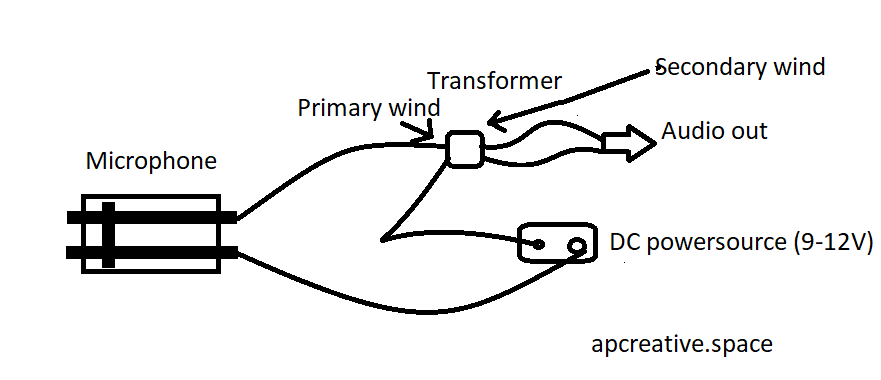
You are to create a simple circuit, including the carbon rods, step up transformer, 9v battery and an audio out connector as it shows on the diagram. After connecting everything together, it should look like that, I also include a quick non technical drawing how to connect everything together.
Things to note about building this.
- Make sure that the linking rod is moving freely and not touching the sides of the box anywhere
- If you are using a preamp-amp-headphone set up, be very careful with volume levels. The microphone is extremely sensitive to movement so be prepared to experience massive spikes as the rods moves too much. It is probably better not to use power amplified headphones for testing. Not that I am speaking from experience. Just to stress this: the device is VERY sensible to movement as the whole operation principle is based on movement. As the connecting rod is not secured in any way, the smallest knock will send peak volume straight to your amp and headphones. Definitely try to secure the box in place.
- The tricky thing is that despite knowing the above you probably will have to set the pre-amp gain very high as the signal produced will be weak. This of course could be improved with using a stronger transformer, but basically we are amplifying with the transformer sooooo….
- It will pick up your voice and I have made a successfully recorded music from a speaker, but in my experience you really have to be close to the mic for reasonable result and of course the frequency response is very narrow (never had it measured, but it would be interesting to know)
- Try the mic response with a sound board first. My one picked up tremors through the desk, just by scratching or lightly knocking on the table. You can place a piece of thin wood (or any other solid material) over the box, and it will work like a contact microphone for movement. Just be careful not to knock the loose rod off.
- Secure all the components on board or a try, if you have a hot glue gun you can disassemble everything without much damage to the components
To wrap things up, here is a public service announcement which I have made at New Year’s Eve in 2020 using this set up and the very same mic on the picture above

Pingback: Build a microphone from scratch – my loose contact carbon microphone design soon available as a kit | Creative