Some time ago I have made a post about the first rite of passage to DIY 3d printers. It was about a year ago and since then, with a little bit of break I have picked up on that quite a bit.
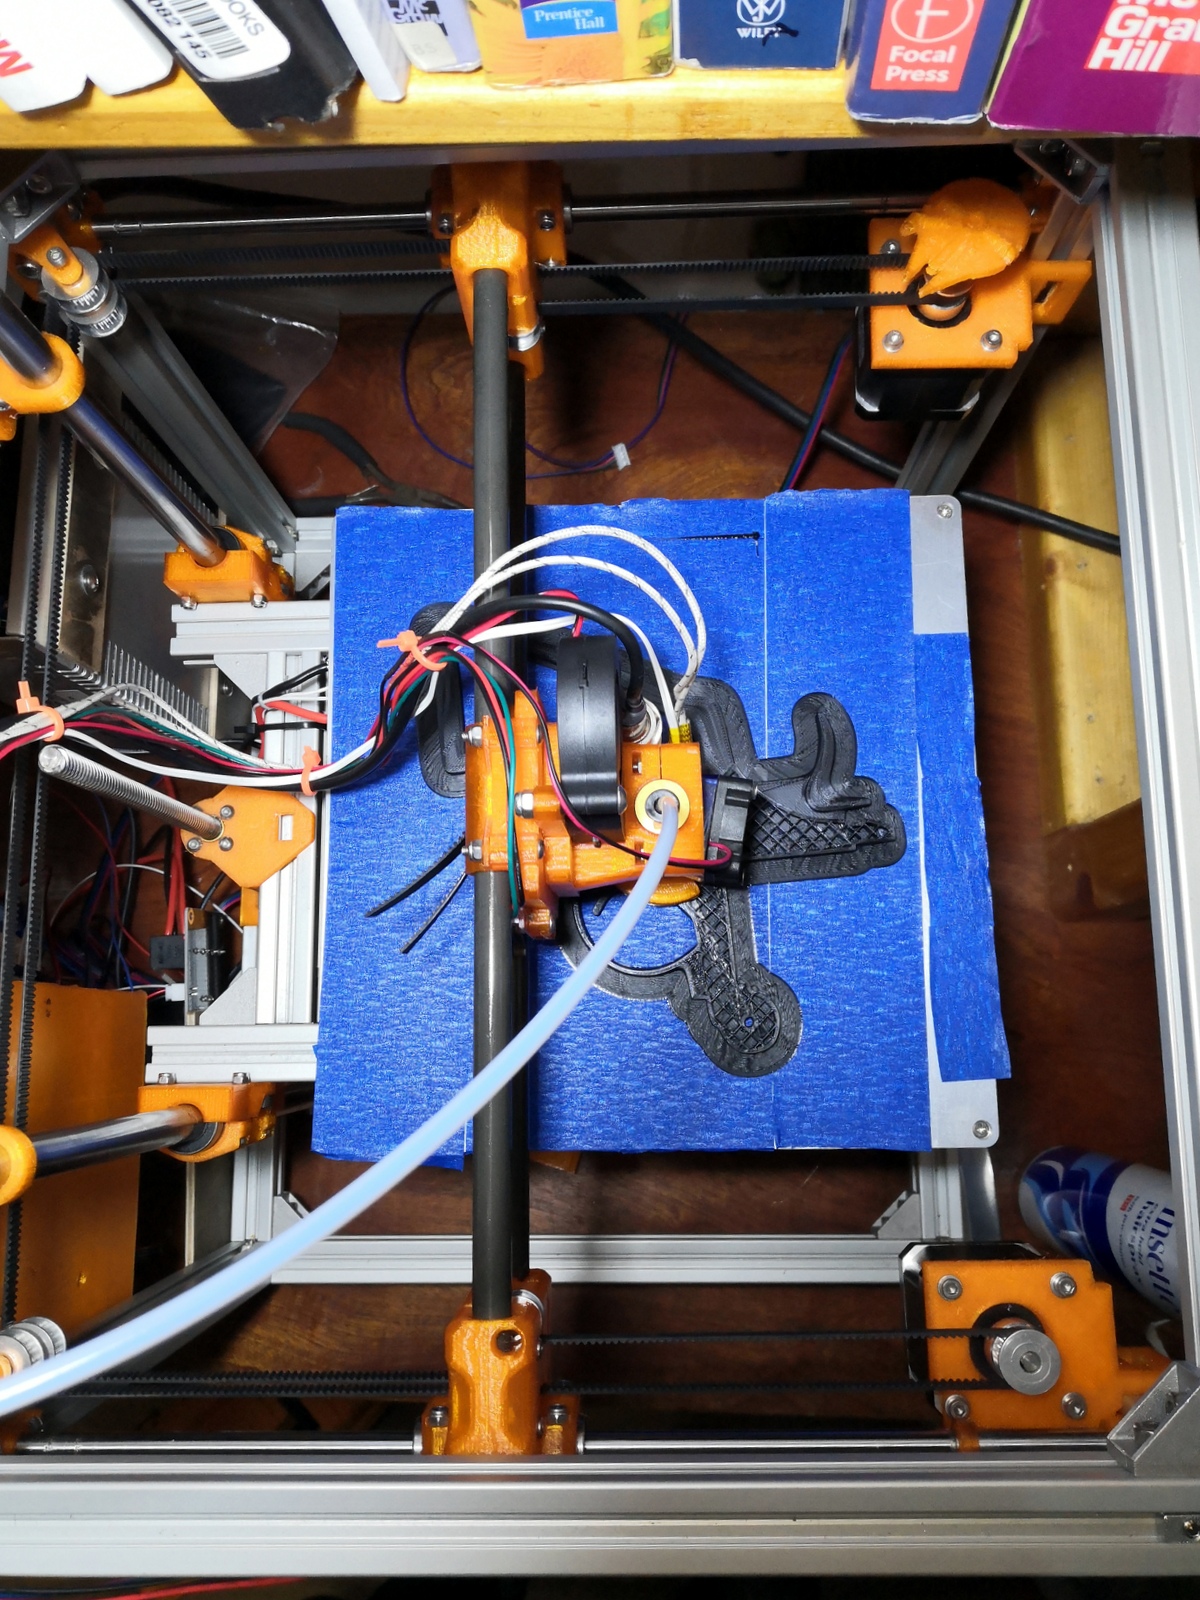
By now, I have almost finished another DIY (scratch) build printer, a Hypercube which is a design from Tech2C.
The aim of this post is not so much about this particular machine, but I have spent a great deal of time testing the newly built printer and I thought it would be a good idea to make an “action plan” for people like me who has never done it before. It can be applicable to any FDM printer regardless if it is from a kit or not. I am not elaborating on each individual processes, most of them are easily obtainable from other blog/ vlogs/ etc. Some of the processes can be found on this blog. I am also planning to write about specific procedures of specific fine-tuning/ setting up
OK, so you have your assembled machine.
- Check if all the moving parts to all directions are square and parallel depending on the orientation and the type of the printer (i.e. cartesian, corexy). This can prevent quite a lot of hassle later on when you fine-tune or dealing with printing issues. A rooky mistake by a lot of people that they are checking parts position according to a spirit level or the platform where the printer sits on. That is bad practice, you need to check things compared to the frame of your printer, otherwise it might be perfectly square to your desk or to the gravitational field, but it will not be very useful for you.
- Familiarize yourself with the Marlin G-code functions (or whatever other firmware you are using)

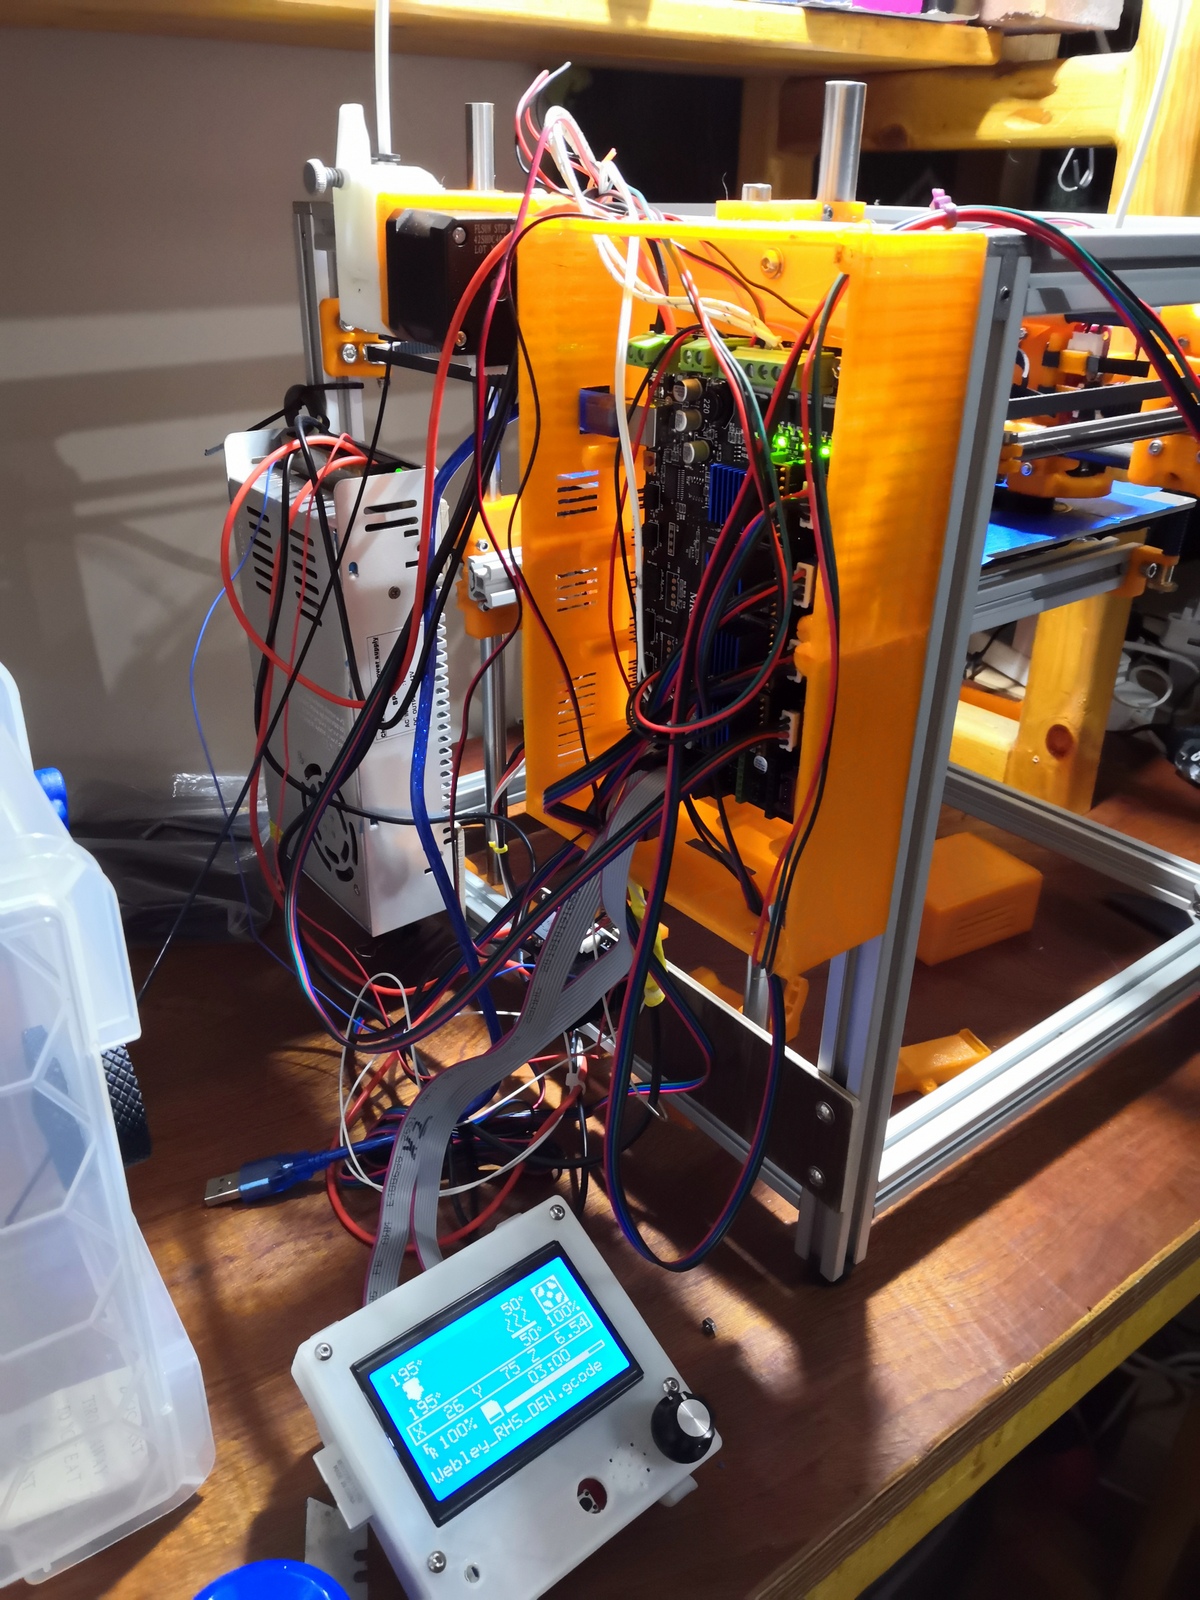
- Check movement of X; Y; Z directions are moving to the right way. Especially if you have built your printer from parts you have collected from here or there, pins orientations, cable connections, plugs, etc might not be the same or even compatible with each other. I have tested everything through the console monitor in the Arduino IDE. I’ve built this printer with an MKS 1.4 control card (which is based on the Arduino mega).
- Test separately each parts which use electricity. Fans, heaters, end stops, etc. Every part can be switch on/off through your console. Refer to the G-code list.
- Test whether step/ unit settings on your motors are correct. It depends on how you “jumpered” your board and what motor drivers you are using. Try to move the hotend by 10 cm, see if it is really moving the determined distance. Same applies to your extruder. Bear in mind, in order to get the extruder moving, you have to pre-heat your hotend to operational temperature.
- Try to home your hotend. Now, I have not fully assembled my machine before testing, I have just wired everything up, just in case remedial work was needed, so I have easy access to everything. I did not even have (still don’t) an on/off switch, I have used a plug which has its own. The reason why that is advisable, is that once you hit enter on the G28 (the homing g-code command) your machine will move till the homing codes end, regardless if it is destroying itself in the process, should you set something wrong during assembly. I would keep one hand on the enter button and one hand on a physical power switch as there is no other way stopping the process.
- Level the printing bed. Depending on what “Z” end stop you are using, the process slightly differs . Even if you’re using the self levelling function of your printer, this is an advisable step to take, to lessen the required calculations and moves during printing
- Set nozzle off set. I have posted about that before previously and there are plenty of info about that on YouTube or relevant forums.
- Test your graphic display (if you use one), set up Octopi or whatever else you might want to use
Finally, try to print something….. Good luck.
